Service Manager
Working with Problems
Problems can be logged by users other than the Problem Manager. Problems are usually logged from other sources, including Service Desk Analysts working on incidents.
•Creating a Problem from an Email
Creating a Problem
1.Log in to the application as a Problem Manager.
2.Open the Problem workspace. A list of problems appears.
3.Click New Problem or select a template from the Action Menu. A blank problem page appears.
Blank Problem Record
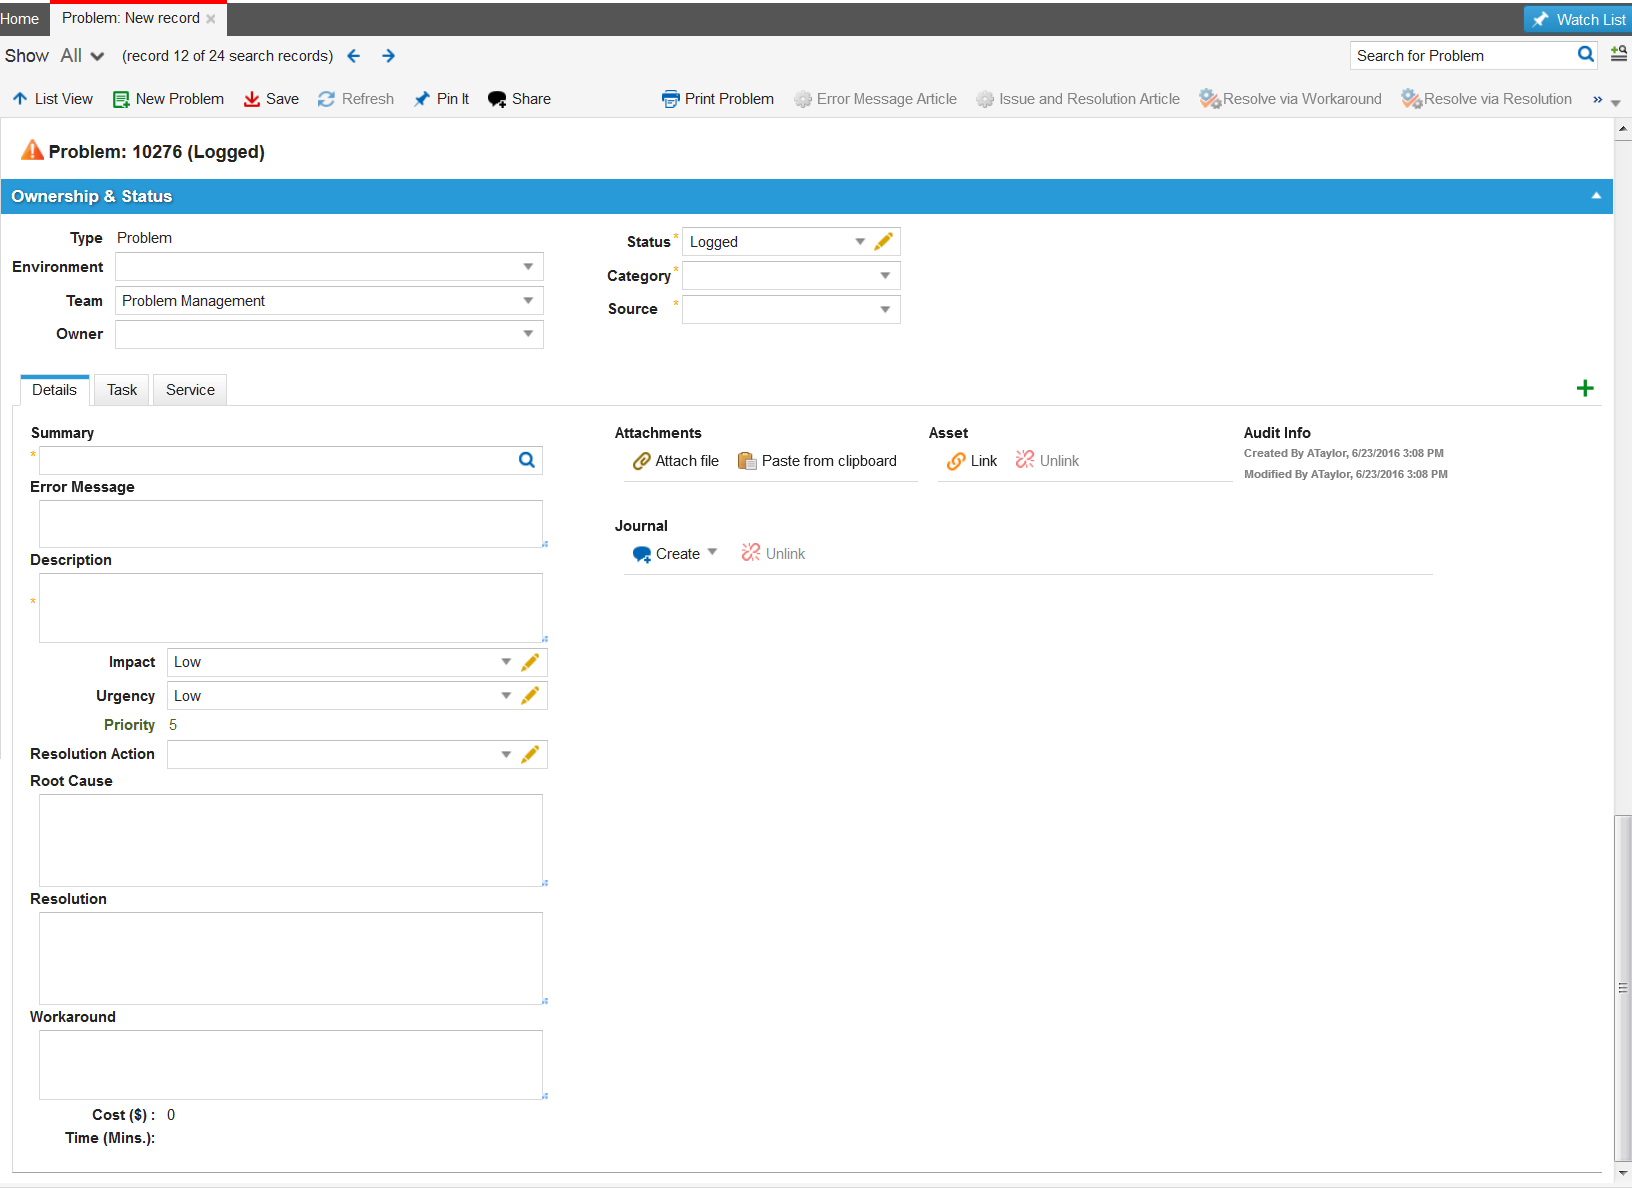
The following default tabs appear (results may vary depending on your system setup):
•Details: Continue to the next step.
•Task: See Working with Tasks.
•Activity History: See About Activity History.
•Root Cause: See Resolving a Problem
•CI: To create or link to a
•Incident: To create or link an incident, see Managing Incidents.
•Change: To create or link a change, see Creating a Change Request
•Attachment: To attach a file or URL, see Working With Attachments and URLs.
•Service: To create or link a service, see Working with Services.
•Problem Review Board: See Working with the Problem Review Board.
•Related Posts: See About the Related Posts Tab.
•FAQ: See Announcements and FAQs.
•Announcement: See Announcements and FAQs.
•Alerts: See About Alerts.
•Workflow Instance: See Working with Workflow Instances.
•Audit History
4.From the Details tab, enter information into the fields.
| Field | Description |
|---|---|
| Summary |
A brief description of the problem. Click the related items icon |
| Error Message |
Any error message received. |
| Description |
A detailed description of the problem, including conversations and methods tried. |
| Action |
The action taken. Choose from the drop-down list or click the edit icon |
| Resolution |
The resolution. Describe in detail how the problem was resolved. |
| Environment |
The operating environment. Choose from the drop-down list or click the edit icon |
| Workaround | Optional. The workaround used. |
| Type |
Automatically set to Problem. When a root cause has been identified, the type is automatically set to Known Error. After the type is set to Known Error, the Root Cause tab appears. See Adding a Root Cause to a Problem. |
| Status |
Automatically set to logged. Select a status from the drop-down list. If the type is set to Known Error, the status is automatically set to identified.
Only Problem Managers can set the status to investigation. |
| Category |
The problem category. Choose from the drop-down list or click Edit to add a category to the list. |
| Source |
How the problem was received. Choose from the drop-down list or click Edit to add a source to the list. |
| Urgency |
The urgency that represents the tolerance for delay if the problem is not resolved. Click Edit to add an urgency type to the list. |
| Impact |
The impact of the problem. Click Edit to add an impact type to the list. |
| Priority |
The priority. Calculated by urgency and impact. By default, the urgency and impact values are set to low. See Default Priority Values. |
| Team |
The team. Choose from the drop-down list or click Edit to add a team to the list. |
| Owner |
The owner. Choose from the drop-down list or click Edit to add an owner to the list. |
| Cost |
The cost. Automatically generated by the system. |
| Time |
The time, in minutes, spent on this problem. The system automatically generates this value based on the activity history. |
 to find possible related records.
 to add an action to the list.
5.Click Save. The problem is logged, and the system notifies the Problem Manager if either the impact or urgency of the logged problem is high.
Creating a Problem from an Email
You can only create a problem from an email if the administrator has configured the email configuration inbox for the Problem business object. The administrator can also provide templates for creating problems from emails.
To create a problem from an email, you must have a record in the employee form and you must send the email from the email address that is set up for you in the Primary Email field of your employee record.
Follow these steps to create a problem from an email:
1.Use the problem email template set up by your administrator.
Sample Problem Email

•The problem fields that are filled in from the email are denoted to the left of the $ sign.
•The $ sign is the field separator value set up for the problem business object.
•The values to the right of the $ sign are the field values.
•You can add other field names that match the problem form to the left of the $ sign.
•To create multiple problem records from a single email, use the record marker field value set up for the problem business object.
2.Send the email to the email address provided to you for logging problems in Service Manager.
The administrator sets this up in the Email Configuration form.
The system sends you an email that the problem has been submitted. The subject of the email contains the problem number for reference. You can refer to this number when searching for the problem in the Self-Service Portal or when contacting the Service Desk regarding this problem.
Modifying a Problem
Only Problem Managers and administrators can change a problem status, but everyone can change any of the other fields.
1.Log into the Service Desk Console.
2.Open the Problem workspace. The system displays a list of problems.
3.Open the problem and make changes.
4.Click Save.
Deleting a Problem
1.Log into the Service Desk Console.
2.Open the Problem workspace. The system displays a list of problems.
3.Select the problem to delete and click the delete icon  from the toolbar. If there are linked references, the system displays the Reference Warnings window.
4.To remove the linked references, click Continue. The problem no longer appears on the list.
Was this article useful?
Copyright © 2019, Ivanti. All rights reserved.